Category: DIY Interior Upgrades | Technical Rating: Beginner to Intermediate | Time: 7-minute read | Focus: Designer Hardware Selection & Basic Device Retrofitting
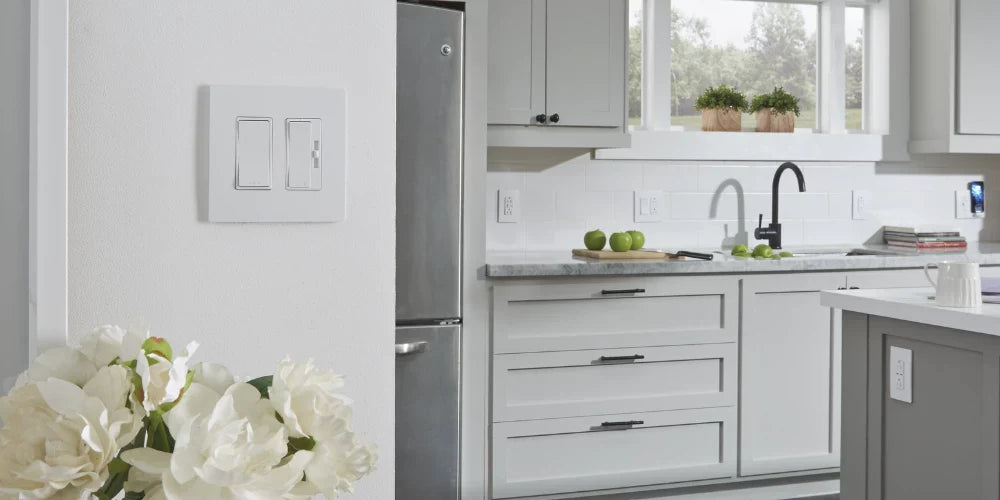
Swapping out basic, builder-grade electrical devices for sleek, architectural hardware is one of the fastest ways to elevate your home's interior design. Whether you choose the clean lines of the radiant® Collection or the unique, square aesthetics of the adorne® Collection, a DIY device refresh delivers immediate style and advanced functionality to your walls.
Step 1: Take Stock & Know What You Need
Before ordering your new designer hardware, you must verify the existing infrastructure inside your wall boxes to prevent alignment or compatibility issues.
1. Understand Gang Count for Wall Plates
- The Definition: "Gang count" refers explicitly to the physical width or the total number of device openings available in your electrical box or wall cover.
- The Sizing: A standalone switch or single receptacle requires a 1-gang wall plate, while two side-by-side devices require a 2-gang wall plate.
- The Scalability: Designer lines from the Legrand collections are modular and scale up to 6-gang configurations to cover large combination wall boxes.

2. Always Replace Circuit Protected Devices Correctly
- Code Mandates: The National Electrical Code (NEC) requires Ground Fault Circuit Interrupter (GFCI) outlets to protect your living spaces from ground fault shocks.
- Damp Environments: GFCIs are required anywhere water or moisture is present, specifically in kitchens, bathrooms, and laundry rooms.
- Advanced Protection: If you are updating outlets in these specific spaces, check your local guidelines or reference the NEC. For enhanced protection against arc faults alongside shock mitigation, choose a combination GFCI/AFCI outlet.

3. Decode Single-Pole, 3-Way, and 4-Way Switches
- Single-Pole Switches: Built to operate a single light fixture or a designated set of lights from one exact wall location.
- 3-Way Switches: Utilized in pairs to control a single lighting load or an array of recessed lights from two separate entry locations.
- 4-Way Switches: Required when your room layout demands independent control of a single light fixture from three or more separate locations (like a long hallway or open-concept living area).

4. Isolate Outdoor Power Requirements
- Environmental Exposure: Adding or updating electrical access on an exterior patio, deck, or porch requires specialized construction.
- Hardware Requirements: Outdoor zones require weather-resistant receptacles paired with a weatherproof enclosure cover.
- Standards Compliance: Ensure your chosen outdoor products carry an explicit UL498 rating to guarantee the components withstand extreme temperature swings and high-moisture environments.

5. Verify When 20A Receptacles are Required
- Regional Rules: Specific geographic areas, including Canada and the city of Chicago, dictate that 20A switches and outlets must be used to pass resale home inspections.
- Dedicated Appliance Loads: If a circuit is running a dedicated, high-draw appliance on its own breaker—such as a kitchen garbage disposal or a dishwasher—the switch and outlet installed must be rated for 20 Amps.

Step 2: Consider Upgraded Features & Aesthetics
Once the technical foundation of your circuit is planned out, you can choose the style upgrades and automated features that best fit your lifestyle.
6. Elevate Your Walls with Screwless Plates
- Architectural Finishing: Standard wall covers use visible mounting screws that disrupt clean lines. Upgrading to specialized screwless wall plates from the radiant or adorne series provides a sleek, sophisticated touch.
- Seamless Snaps: These systems use a two-piece framework where a sub-plate screws onto the device, and the smooth finish plate simply snaps securely over the top.
- The "Invisible" Paint Trick: Avoid painting directly onto plastic plates, which easily chips. If you want an exact wall match, utilize an adorne Custom Wall Plate. These clear plates include a template allowing you to insert a snippet of your exact room paint or wallpaper behind the plate surface for a truly seamless blend.

7. Upgrade to Safer Tamper-Resistant Outlets
- Shutter Mechanisms: Modern Tamper-Resistant (TR) outlets feature an internal, patented shutter system that blocks foreign objects from being inserted into the slots, protecting children from accidental shocks.
- Aesthetic Bonus: If your home was constructed before 2008, you likely still have old standard outlets. Upgrading to TR models completely eliminates the need for unsightly plastic outlet caps.

8. Set the Scene with the Right Dimmer
- Bulb Calibration: Dimmers are engineered to manage specific lighting loads. If you are uncertain about your exact lamp or bulb chemistry, utilize an option like the Tru-Universal Dimmer, which automatically self-calibrates to handle virtually any dimmable bulb type.
- The Neutral Requirement: High-performance universal dimmers require a dedicated neutral wire (typically white or neutral-colored) inside the wall box to function properly.

9. Implement Motion Sensors for Hands-Free Utility
Integrating sensors into your wall boxes ensures you never have to worry about family members leaving lights running in empty spaces. Match your choice to the targeted room's traffic patterns to maximize energy savings:
| Sensor Type | How It Operates | Best Application Room |
| Occupancy Sensor | Automatically turns lights ON upon entry, and OFF when empty. | Laundries, mudrooms, walk-in closets. |
| Vacancy Sensor | Requires a manual press to turn ON, then automatically shuts OFF when empty. | Bedrooms, home offices, energy-code zones. |

10. Mix Standard Controls with Smart Controls
- Custom Control Banking: You can freely mix regular mechanical switches with advanced smart devices across your home, and even place them side-by-side within the exact same multi-gang box. Consider mixing smart and standard switches to customize your lighting control to your exact needs.
- Check the In-Box Accessories: Keep a close eye on the packaging requirements when ordering your hardware checklist. While certain designer smart switches come packaged with an included single-gang wall plate, other premium brands typically require you to purchase the matching screwless wall plate separately. Always check the product details so you don't forget to add the required matching plates to your cart.

Step 3: Pro-Level On-the-Job Execution
Achieving a flawless, architectural finish requires pairing premium designer hardware with seasoned field installation techniques during the final wrap-up phase.
Pure Terminal Connections
Avoid using the cheap, spring-loaded "stab-in" push holes found on the reverse side of low-end contractor devices. These terminal types can settle and loosen over long durations as structural framing moves, resulting in intermittent voltage drop or total power loss. Instead, wrap your wire paths securely around the side terminal binding screws, or take advantage of the heavy-duty back-wire pressure plate assemblies standard on specification-grade Legrand devices to achieve a permanent, vibration-proof mechanical connection.
The Clockwise Loop Rule
When wrapping bare wire leads around side terminal screws, always form your open hook in a strict clockwise direction. Because terminal screws lock down and tighten clockwise, the rotational friction of your screwdriver will naturally pull the wire loop tighter inward around the screw shank. Wrapping a wire counter-clockwise forces the loop outward and pushes the conductor off the terminal block as the screw seats.
Insulate and Wrap the Device Body
Before folding your completed wired device assembly back into the electrical junction box, wrap the outer perimeter of the switch or outlet chassis two full rotations with premium high-tensile black electrical tape. Ensure the tape completely blankets the exposed side terminal screws. This swift extra step introduces a rugged insulated defense boundary, ensuring that tightly packed bare ground wires inside a crowded metal or plastic box can never shift and cause a short-circuit against a live hot terminal.
The Accordion Fold Technique
Never forcefully jam, press, or ram a wired switch assembly straight back into an electrical box. Aggressive pushing can easily split insulated wire connectors, crack structural backing panels, or nick insulation jackets out of your direct line of sight. Instead, pre-bend your copper conductors into fluid, alternating zig-zag directions behind the yoke. Folding the lines cleanly like an accordion lets the device seat smoothly back into the gang space without placing mechanical stress on your final terminal connections.
Safety Reminder: Before beginning any electrical project, always go to your home's main service panel and turn off the circuit breaker for the box you are working on. Verify the wires are dead using a reliable non-contact voltage tester before touching any terminal screws.
Find Your Complete Upgrade Path at Bees Lighting
Bringing high-end designer styling to your home's walls requires matching your project with the right professional components. At Bees Lighting, we stock a comprehensive inventory of Legrand radiant and adorne switches, dimmers, tamper-resistant receptacles, and screwless wall plates to bring your vision to life. Whether you are modernizing a single bedroom or retrofitting an entire home with smart automation, our solutions deliver a clean, code-compliant finish.
Need help determining your wall box gang counts or verifying neutral wire compatibility for a universal dimming project? Call our technical electrical sales specialists at 855-303-0665 for expert product matching and project quotes.


