

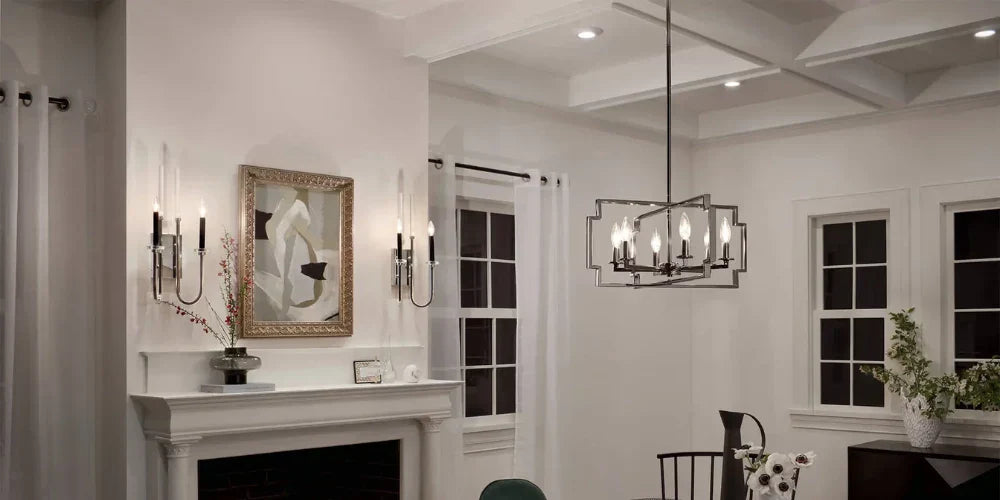
The Formal Room Proportional Blueprint
To properly frame a luxury formal room featuring structural overhead millwork, implement these exact geometric scaling formulas:
- The Table-to-Fixture clearance: Maintain approximately 30 to 36 inches of clear vertical space between the lowest point of your chandelier trim and the surface of the dining table.
- Rectangular Table Sizing: Ensure the total width of the primary chandelier is at least 6 inches narrower than the total width of the dining table to prevent head-strike incidents.
- Round Table Sizing: Specify a central luminaire with a total diameter measuring between 1/2 and 3/4 of the table’s total diameter.
- Wall Sconce Clearance: Install perimeter accent sconces at eye level, precisely 60 to 66 inches from the finished floor line to the center of the backplate, aligning them with major structural millwork panels.
Designing an elegant lighting scheme for custom dining rooms, stately boardrooms, and grand formal spaces requires a deep understanding of spatial scale and structural geometry. When a room features high-end trim options like deep coffered ceilings, standard top-down illumination plans fail. Structural grid-work beams break up the flat ceiling plane, creating separate recessed boxes that can block beam spreads, trap light, and visually slice oversized fixtures in half if the layout isn't meticulously calculated.
To deliver a sophisticated, well-balanced environment, project estimators, electrical contractors, and high-end architects must shift away from single-source overhead illumination. Instead, they must treat the structural grid as an asset, balancing primary Chandeliers and Dining Room Lighting layers with strategic Wall Sconces and Lighting Fixtures along the perimeter. This technical guide outlines the mathematical drop equations for architectural trim layers, details horizontal spacing rules, and explains how to layer light across complex, multi-tiered structural volumes.
1. The Millwork Equation: Navigating the Physics of Coffered Ceilings
A coffered ceiling is a premium architectural trim feature composed of recessed square or rectangular panels framed by a network of deep, decorative wood or plaster beams. While this treatment adds immense character and luxury to formal rooms, it introduces significant vertical and horizontal clearance challenges for light placement.

The primary hurdle is managing beam blockage. Traditional deep-can fixtures or surface-mounted flush rings can easily cast harsh lines and irregular shadows if they are placed too close to a descending beam profile. Furthermore, the electrical rough-in junction boxes for statement luminaires are typically mounted up inside the true sub-ceiling deck (the interior recessed box panel) rather than sitting flush on the lower face of the framing beams.
This means that structural placement must align perfectly with the absolute center points of the millwork grid boxes. Failing to calculate the precise intersection of these center points results in an off-balance layout that disrupts the room's symmetry and misdirects targeted foot-candles away from active workplanes below.
2. The Drop Equation: Calculating Dining Room Chandelier and Lighting Height
Establishing the correct scale and hanging height for your central light source depends entirely on the proportions of the underlying furniture pieces and the vertical depth of the recessed coffer framework.
The Baseline Clearance Rule
The core dimension for setting your Dining Room Chandelier and Lighting Height requires keeping the lowest hanging crystal, metal band, or glass diffuser exactly 30 to 36 inches above the finished dining table surface. This height window guarantees an open sightline across the room while concentrating a warm, inviting pool of task light directly over the center of table settings.

Compensating for Coffer Box Depth
Because the mounting canopy anchors up inside the recessed panel deck rather than sitting flush with the bottom edge of the decorative beams, installers must calculate their hanging chain or downrod extensions using a modified equation:
Total Chain Suspension Length = Baseline Clearance Drop + Table-to-Beam Delta + Coffer Box Depth Recess
If you fail to include the extra depth of the coffer recess (which typically adds 4 to 8 inches of hidden vertical space), the chandelier will sit too high up inside the grid cavity. This error traps a large portion of the horizontal beam spread inside the wood box, under-illuminating the table and creating unwanted glare spots on the interior millwork trim.
Horizontal Sizing Proportions
To ensure proper clearance, you must scale the physical diameter of the chandelier to match your specific table geometry:
- Rectangular & Oval Layouts: The overall diameter or width of the chandelier must measure at least 6 inches narrower than the total width of the dining table surface. Maintaining this minimum 3-inch buffer zone on either side prevents guests from accidentally bumping their heads when standing up from their chairs.
- Round Table Configurations: For square or round dining spaces, specify a round chandelier with a total width or diameter measuring between 1/2 and 2/3 of the table's total diameter. This keeps the fixture perfectly scaled to the underlying furniture without overwhelming the surrounding room footprint.

3. Symmetrical Harmony: Integrating Wall Sconces and Lighting Fixtures
Relying solely on a large center chandelier to light a formal room creates an uneven, high-contrast environment. The center table ends up over-illuminated, while the perimeter walls and architectural millwork fade into dark shadows. To balance the room's dimension, builders must introduce a low-intensity horizontal layer using high-end Wall Sconces and Lighting Fixtures.
By pairing a central statement fixture with side accent sconces, you highlight the room's perimeter boundaries and emphasize structural millwork details without over-illuminating the space. To lock in a balanced, symmetrical installation, follow these layout rules:
- The Eye-Level Alignment: Mount wall sconces so that the vertical center of the electrical backplate sits precisely 60 to 66 inches above the finished floor line. This places the light path directly at eye level, ensuring a comfortable, glare-free wash across the walls.
- Architectural Panel Framing: Always align sconce positions with the vertical lines of the room's wall molding, panel treatments, or flanking millwork features. When lighting a long formal dining wall, place dual accent sconces flanking a luxury sideboard buffet or mirror assembly to build an attractive design focus.

- Independent Circuit Control: To maximize the usability of a formal room, always place wall sconces on a separate circuit from the main ceiling chandeliers. This lets users dim the overhead task lighting down during formal dinners, leaving the side sconces to wash the room's perimeter in a soft, low-intensity glow that enhances architectural depth.
4. Bridging Vertical Plenums: Floor Lamps for Living Rooms and Bedrooms
In large custom homes, formal dining rooms often sit adjacent to high-volume rooms like grand entry salons, formal living rooms, or master bedrooms featuring vaulted treatments or soaring tray ceilings. When managing these open-concept, high-clearance volumes, extending a rigid grid-lighting network across every zone can become visually monotonous and flat.
To solve this, designers break up the vertical lines by incorporating premium Floor Lamps for Living Rooms and Bedrooms. Bringing high-quality portable light sources down into the active living space bridges the wide visual gap between low-slung seating furniture and distant, high-volume ceiling details.

Specifying high-end torchieres or adjustable pharmacy floor lamps allows you to bounce light off mid-level wall planes, adding layer definition and visual height. This multi-tiered strategy prevents the room's light from feeling completely top-heavy, softening transitions between formal architecture and intimate residential living zones.
5. Proportional Specification: Architectural Dimension vs. Luminaire Scale
The following scannability matrix pairs standard formal room configurations with correct product sizing criteria to help contractors and estimators simplify layout planning:
| Room Dimension & Type | Average Coffer Depth | Optimal Chandelier Diameter | Recommended Sconce Spacing |
|---|---|---|---|
| 12' x 14' Formal Dining (Rectangular Table) | 4" to 6" Shallow Box | 24" to 28" Maximum Width | Flanking sideboard buffet; 5' to 6' apart |
| 16' x 20' Grand Dining (Extended Table) | 6" to 10" Deep Wood Beam | 36" to 42" (Or Dual Linear Fixtures) | Centered within structural wall panels; 6' to 8' intervals |
| 14' x 14' Formal Salon (Round Table Layout) | 5" Molded Plaster Trim | 28" to 32" Circular Chassis | 4-Point perimeter column mapping |
Conclusion: Mastering the Formal Volume
Executing an entry-level lighting plan in a luxury formal room leaves the architectural details looking flat, dark, and disconnected. To protect your project's layout from costly on-site sizing errors, you must treat your structural elements as integrated design anchors. By aligning your main Chandeliers and Dining Room Lighting layers to the precise geometry of your coffered ceilings, adjusting downrod scales to account for coffer recesses, and layering in flanking eye-level wall sconces, you eliminate harsh glare and shadow pockets. This technical, data-driven approach balances your light distribution perfectly, highlighting premium millwork finishes and creating an inviting, visually stunning formal environment from every angle.


