

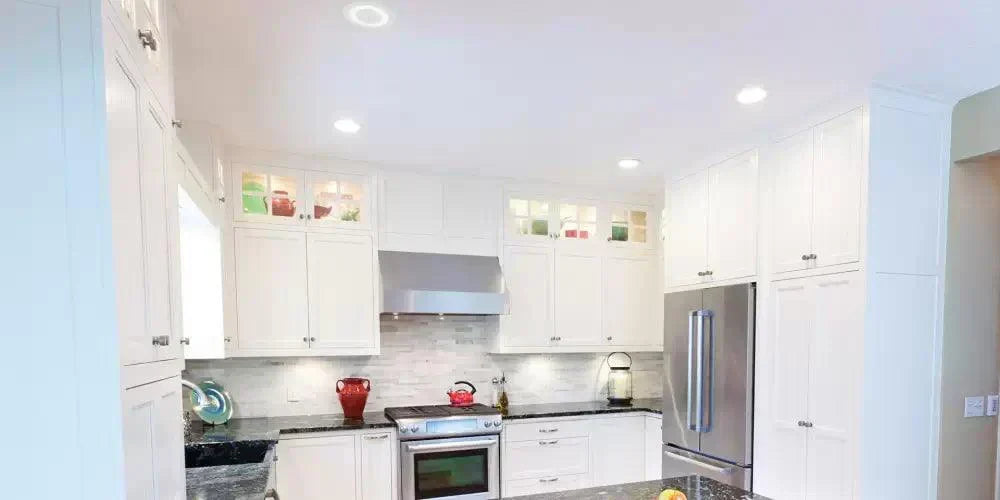
Selecting recessed lighting—often called “can lights” or “downlights”—is one of the most impactful decisions you will make for your home or project. This guide moves beyond the basics to provide the technical standards used by architects and lighting designers.
Step 1: The “Which One Do I Need?” Project Matcher
Before looking at sizes, identify your project type.
- Upgrading Existing Fixtures: Use retrofit LED can lights to upgrade old incandescent or halogen housings without replacing the can.
- New Construction or Remodel: Use canless recessed lighting — no housing required, installs in under 2 inches of ceiling depth.
- Multi-Family / Fire-Rated Ceilings: Specify fire-rated recessed lights to maintain the ceiling’s fire envelope per code.
- Wet Areas (Showers, Outdoor Soffits): Use wet-rated recessed lighting — sealed against vapor and direct water contact.
Specialty Architecture: Vaulted & Sloped Ceilings
Standard fixed downlights are engineered for flat ceilings. If your project involves a pitch or slope, you must utilize Gimbal (Adjustable) fixtures or specialized Sloped Ceiling Trims. Installing a standard light on an angle results in light shooting across the room at eye level rather than illuminating the floor.
To calculate your specific ceiling pitch and determine if you need a “High-Tilt” gimbal, consult our technical walkthrough: How to Light a Sloped Ceiling (Without Lighting the Wrong Wall).

Step 2: Understand the “Plenum” and Clearance
One of the most ignored technical details is Plenum Depth—the space between your ceiling and the floor or roof above it.
- Standard Cans: Require 5 to 7 inches of vertical clearance.
- Canless (Wafers): Require less than 2 inches. These “panel style” lights fit within the thickness of standard 1/2” drywall, allowing you to install them even if a structural joist is in the way.

The Major Hardware Fork: Can vs. Canless
Choosing your fixture platform is the most critical technical decision in your project. While traditional cans offer superior glare control for high-end “quiet ceilings,” canless wafer lights solve almost every installation obstacle in a remodel. If you are unsure which platform fits your structural constraints (like shallow plenums or ceiling joists), check our technical deep dive: Canless vs. Can Lights: Why Canless is the New Standard for 2026.
Step 3: Choosing Your Aperture (Size)
The size of the light (aperture) defines the “feel” of the room.
| Size | Best For | Note |
| 4-inch | Modern Residential Standard | Sleek, designer look; perfect for kitchens |
| 6-inch | General ambient lighting | Traditional standard; widest beam spread for large rooms |
Step 4: Decoding Lumens and Wattage (The Equivalency Chart)
Stop shopping by “Wattage.” In 2026, Lumens are the only accurate measure of brightness. Use this chart to convert your old-school expectations:
| Old Incandescent | 450 - 600 Lumens | Closets, Pantries, Hallways |
| 65W - 75W | 750 - 900 Lumens | Standard Bedrooms & Kitchens |
| 100W+ | 1200+ Lumens | High Ceilings (10ft+) & Lobbies |
Lumens vs. Footcandles: Measuring Usable Light
While Lumens tell you how much light a fixture emits, Footcandles measure how much of that light actually reaches your floor or workspace. A 1,000-lumen light might be perfect for an 8-foot ceiling, but it may fail to provide enough footcandles on the floor if your ceiling is 12 feet high. Learn how to calculate the light levels for your room height in our Footcandle Lighting Guide.
Step 5: Select Your Color Temperature (Kelvin)
Color temperature (CCT) is measured in Kelvins. Many modern fixtures now come with Selectable CCT, but these are the industry standards:
- 3000K (Soft White): The designer’s choice for a warm, residential feel.
- 4000K (Cool White): A clean, crisp white for kitchens, laundries, and offices.
- 5000K (Daylight): Best for high-task areas like garages or craft rooms.
Advanced CCT Options: For the ultimate in ambiance control, consider dim-to-warm recessed lighting, which automatically shifts to a warmer color temperature as you dim — mimicking the natural behavior of incandescent bulbs. For full app-based CCT control and scheduling, smart recessed lighting lets you switch between color temperatures on demand.

Step 6: The Layout Standard (The Half-Height Rule)
Standardize your spacing with the Half-Height Rule: Divide your ceiling height by two.
Height / 2 = Distance between lights. For a standard 8-foot ceiling, place your lights 4 feet apart. To avoid “hot spots” on walls, always place your first row 12 to 18 inches away from the wall.
Applying Your Specs to a Room Layout
While the Half-Height Rule is a great starting point for general spacing, specific rooms—like kitchens and bathrooms—require a “layered” approach that combines task and ambient light. To see specific layout grids for every room in your home, including how to avoid shadows on kitchen counters and the “strobing effect” of ceiling fans, see The Ultimate Recessed Lighting Layout Guide: A Room-by-Room Plan.
Making Your Final Choice
Selecting the right recessed lighting is more than just picking a size; it’s about understanding the specific physical and functional needs of your space. By identifying your plenum depth, following the Half-Height spacing rule, and choosing the correct lumen output, you ensure your lighting is both beautiful and high-performing. Whether you opt for the architectural precision of 4-inch gimbals or the versatile ease of canless wafer lights, these technical standards will help you build a lighting system that lasts for years.


