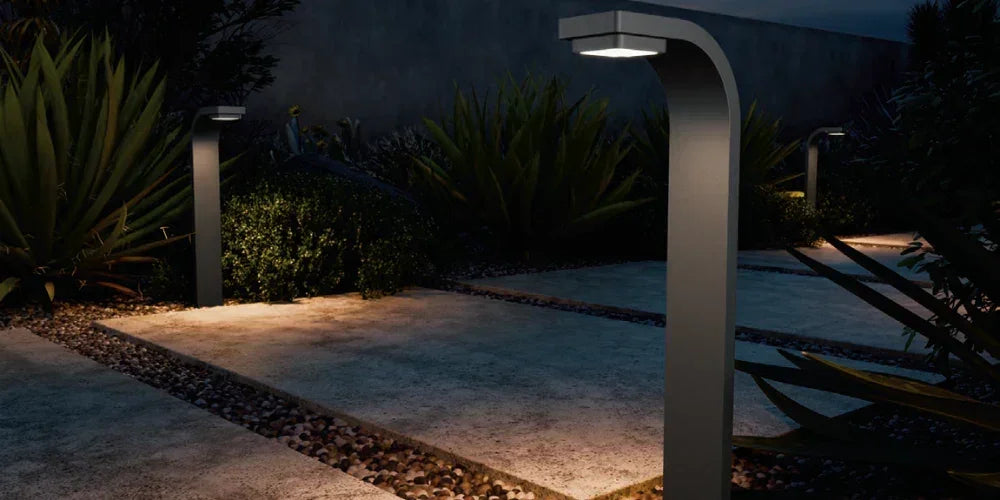
The magic of a beautifully designed landscape doesn't have to fade when the sun goes down. With a thoughtful lighting plan, the features that make your outdoor space special during the day can be transformed into a dramatic and enchanting scene at night. The light that shines on a landscape is what brings its beauty out of the darkness, creating an entirely new way to experience your property.
That’s why having a clear design strategy is crucial. It’s the difference between simply placing fixtures and artfully painting with light. To help you create a plan that enhances your home's architecture and brings your garden to life, we've gathered essential techniques to help you illuminate your project or your client’s property with style and purpose. Let's explore how to get started.
Select the Perfect Color Temperature
One of the most impactful choices you'll make in your lighting design is selecting the right color temperature. Measured in Kelvin (K), color temperature determines whether the light appears warm or cool, and it can dramatically enhance the natural colors of your home and landscape. Many integrated LED fixtures offer a range of temperatures, allowing you to tailor the light to specific features.
Here’s a guide to help you choose the best fit for your project:
|
Warm White (2700K) This is the inviting, cozy glow we often associate with traditional indoor lighting. Its soft, yellowish hue is perfect for creating a welcoming atmosphere. Best for: Surroundings with warm tones like brown, tan, or cedar. It beautifully complements natural-colored stonework and highlights foliage with red, orange, or yellow tones, such as oak trees. |
Pure White (3000K) A crisp and clean white light that offers a more neutral and contemporary feel without being too cool. It makes colors appear vibrant and true. Best for: Landscapes featuring dark materials like slate, deep gray pavers, or black accents. It also excels at illuminating foliage with blue or purple tones, making plants like blue spruce trees pop. |
|
Cool White (4000K) This bright, bluish-white light creates a modern and clean aesthetic. It's less common for general residential landscapes but can be used strategically. Best for: Highlighting contemporary architecture and is frequently used in commercial applications where a very bright, alert feel is desired. |
Daylight (5000K) An intense, bright white light that mimics natural daylight. It provides high contrast and visibility. Best for: Illuminating evergreen trees and shrubs, where its crispness accentuates the deep greens. It is also a popular choice for commercial settings requiring maximum brightness. |


Choose the Right Beam Angle
After color, the next crucial element to consider is the beam spread, which is simply the width of the light's cone. Selecting the correct beam angle ensures that light is concentrated precisely on your intended focal point, preventing wasted light and creating a more professional, polished look. A tall, narrow tree requires a very different beam spread than a wide stone wall.
Modern LED lighting is perfect for this, as it provides a sharp, precise beam edge that keeps the light exactly where you want it.
How to Select a Beam Spread
Consider the height and width of the feature you're illuminating to choose the best angle:
- Narrow Beams (10° to 15°): Ideal for tall, thin structures or foliage. Use this tight beam to illuminate soaring trees, flag poles, or architectural columns, drawing the eye upward.
- Medium Beams (25° to 45°): This is your versatile, go-to range for general accent lighting. It's perfect for highlighting medium-sized features, like a prized ornamental tree or a significant landscape sculpture.
- Wide Beams (55° to 60°): When you need to cover more area on shorter, wider objects, this is the right choice. It works well for illuminating broad evergreen shrubs, short but wide trees, or sections of a garden bed.
- Flood Beams (120°): This extra-wide spread is designed for broad, even coverage. Use it for techniques like wall washing, where you create a uniform glow across a large surface like a house wall or a privacy fence.

Master Your Fixture Spacing
Proper fixture spacing is where art meets science. Where you place your lights determines not only what is illuminated but also where the shadows fall. The interplay between light and shadow is what creates depth, contrast, and a natural rhythm in your design. Spacing fixtures too close together can create a flat, washed-out look, while spacing them too far apart can result in uneven "hot spots" and dark voids.
Understanding Light Intensity
To get spacing right, it helps to understand a key concept: illuminance. This is the technical term for the amount of light that falls on a surface, and it's measured in footcandles.

Think of it like this: the light from a fixture is naturally brightest right at the source. As the light beam travels further away, it spreads out to cover a larger area. Because the same amount of light is now spread over more space, the illuminance (or the number of footcandles) decreases. This is why a wall appears brightest right where a light is aimed and gradually gets dimmer further from the center of the beam.
Understanding this principle is the key to effective spacing. By knowing how a fixture's light diminishes over distance, you can strategically place your lights to create overlapping pools of soft light for a continuous wash or create distinct, dramatic highlights with intentionally darker spaces in between. For precise planning, manufacturers often provide photometric charts that show exactly how many footcandles a fixture will deliver at various distances, helping you perfect your layout.
Calculate Project Load & Wire Size
Getting the technical details right is essential for a safe, effective, and long-lasting landscape lighting system. This involves two key steps: choosing the correct transformer to power your system and selecting the right wire gauge to ensure every light performs perfectly.
Choosing a Transformer
The transformer converts your home's standard 120V power to the low voltage (typically 12V-15V) your lights need. To pick the right one, you need to know your total system load.
- Calculate Total Load: Look for the VA (Volt-Amps) value on each of your planned fixtures. Add all the VA values together to get your total system VA.
- Match to Transformer: The total VA of your fixtures should not exceed the wattage rating of your transformer. It's wise to choose a transformer with a capacity slightly higher than your total load to allow for future additions.
Example: If you have 15 fixtures that each have a VA of 20, your total system load is 300 VA (15 fixtures x 20 VA). You should choose a transformer rated for at least 300 watts.
Shop Low Voltage Transformers ►
Calculating Voltage Drop & Wire Size
Voltage drop is the natural decrease in voltage that occurs as electricity travels along the length of a wire. If the drop is too significant, fixtures at the end of a long run can appear dim or fail to turn on. To prevent this, you need to select the appropriate wire gauge for each run. We recommend starting with 12-gauge wire and adjusting if needed.
The goal is to ensure the voltage at your last fixture remains above 10 volts.
The Voltage Drop Formula

You should perform this calculation for each separate wire run from the transformer.
- Transformer Tap Voltage: The voltage level you are using from your transformer (often 12V, 13V, 14V, or 15V).
- Total Watts on Run: The sum of the wattage of all fixtures on that single wire run.
- Length of Wire: The total length of that wire run in feet.
- Wire Constant: A predetermined value based on the wire's gauge.
| Wire Constant | |
| 18 gauge | 1,380 |
| 16 gauge | 2,200 |
| 12 gauge | 7,490 |
| 10 gauge | 11,920 |
| 8 gauge | 18,960 |
What if Your End Voltage is Below 10V?
If your calculation shows the voltage at the last fixture is below 10V, you have a few options:
- Select a Higher Voltage Tap: If your transformer allows it, switch to a higher tap (e.g., from 12V to 13V) and recalculate.
- Decrease the Load: Reduce the number of fixtures (total wattage) on that specific wire run and recalculate. You may need to create an additional run.
- Increase the Wire Gauge: Switch to a thicker wire with a lower gauge number (e.g., from 12-gauge to 10-gauge). The higher wire constant will reduce the voltage drop.
Bring Your Vision to Light
Designing a landscape lighting scheme is a rewarding process that blends artistic vision with thoughtful planning. By carefully selecting the right color temperature to enhance natural tones, choosing the perfect beam angle to pinpoint focal points, mastering your fixture spacing to create rhythm and depth, and ensuring your technical calculations are correct, you can transform any property into a stunning nighttime showcase. These design principles are your roadmap to moving beyond simply placing lights to truly sculpting a beautiful and immersive outdoor experience.
Ready to turn your design into a reality? Bees Lighting has everything you need to bring your project to life. From high-quality LED fixtures in a range of color temperatures and beam spreads to professional-grade transformers and wiring, we provide the tools you need to create a safe, durable, and breathtaking landscape lighting system.


